|
Everything
you wanted to know about Rusty Iron Keels but were afraid to ask...
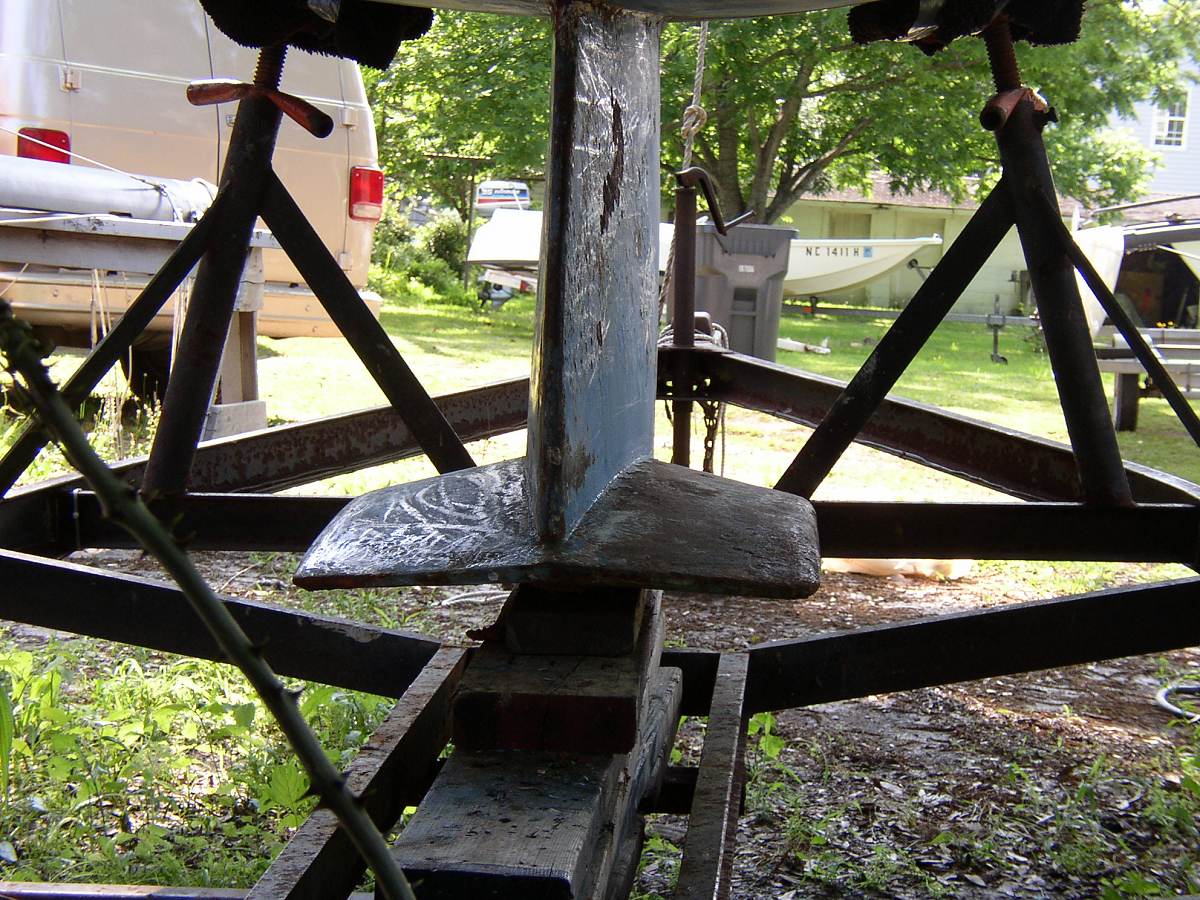
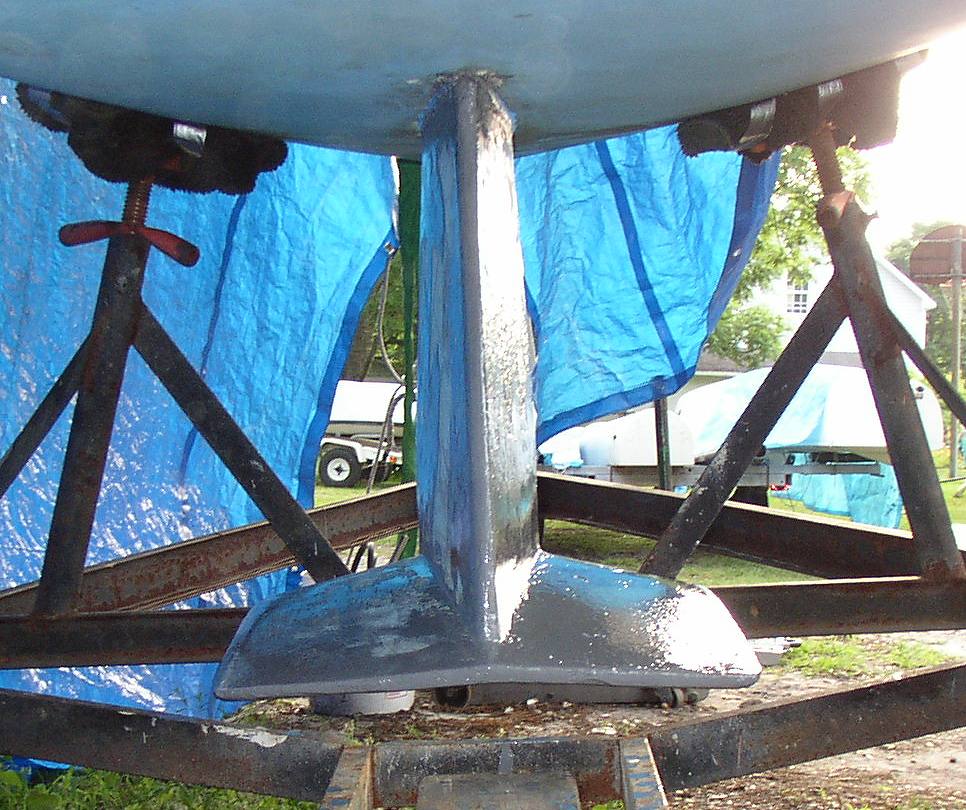
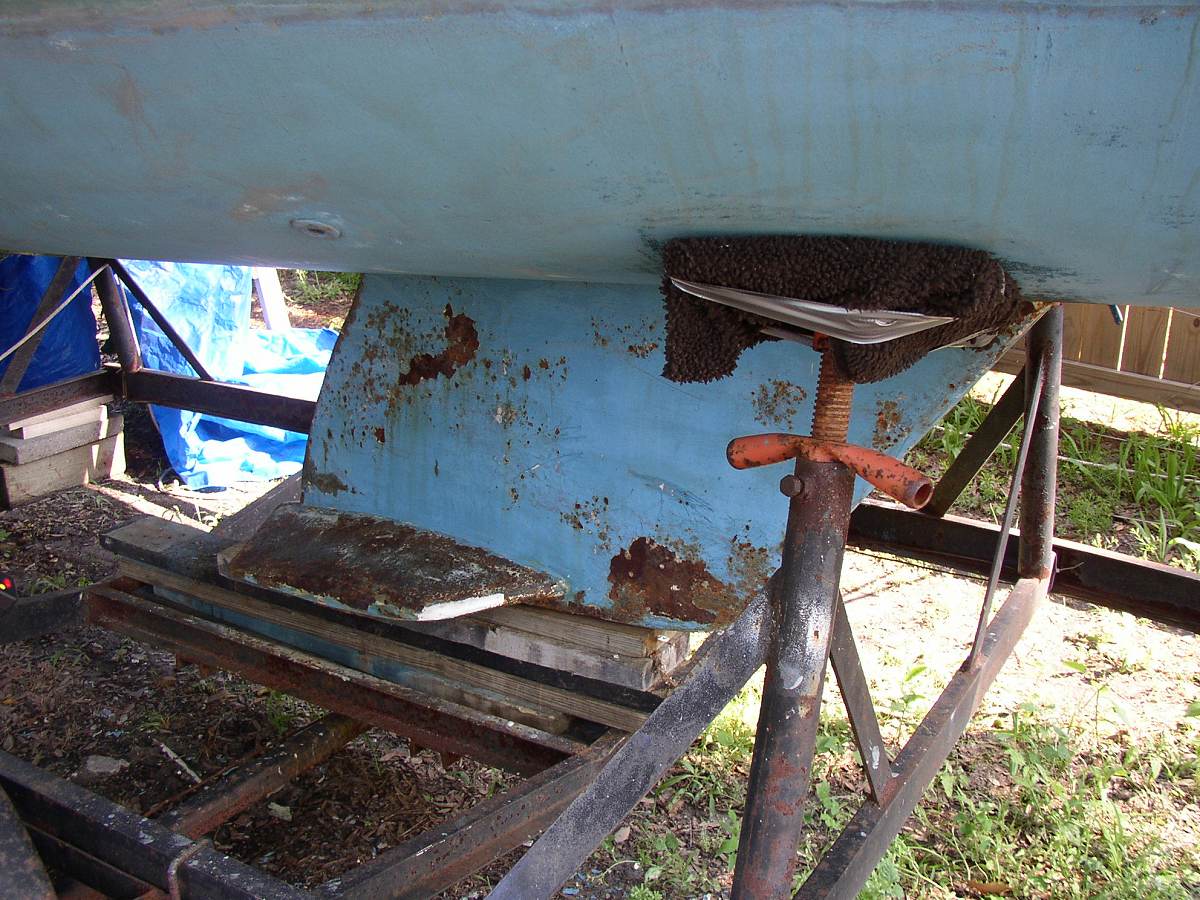
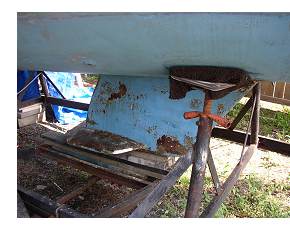
Ye olde First 235 wing keel before sandblasting and treatment. This
is the typical pitting you see after salt water immersion for several
years or more. The wings actually have a fiberglass/epoxy coating
over the iron. This sample also had enough oysters on the wings
to feed 12 people with or without visit to emergency room...
Below are the results
of a bewildering search over the net and newsgroups for ideas on
fixing the dreaded rusty iron keel, certainly the bane of existence
Top 5 for the sailboat owner unlucky enough to inherit such a design.
Of course, lead is not without its problems too but iron is surely
a bit more difficult to maintain. What you save in initial ducats
you will surely sweat away in hours toiling with solutions. And
solutions seem to be a dime a dozen with different approaches depending.
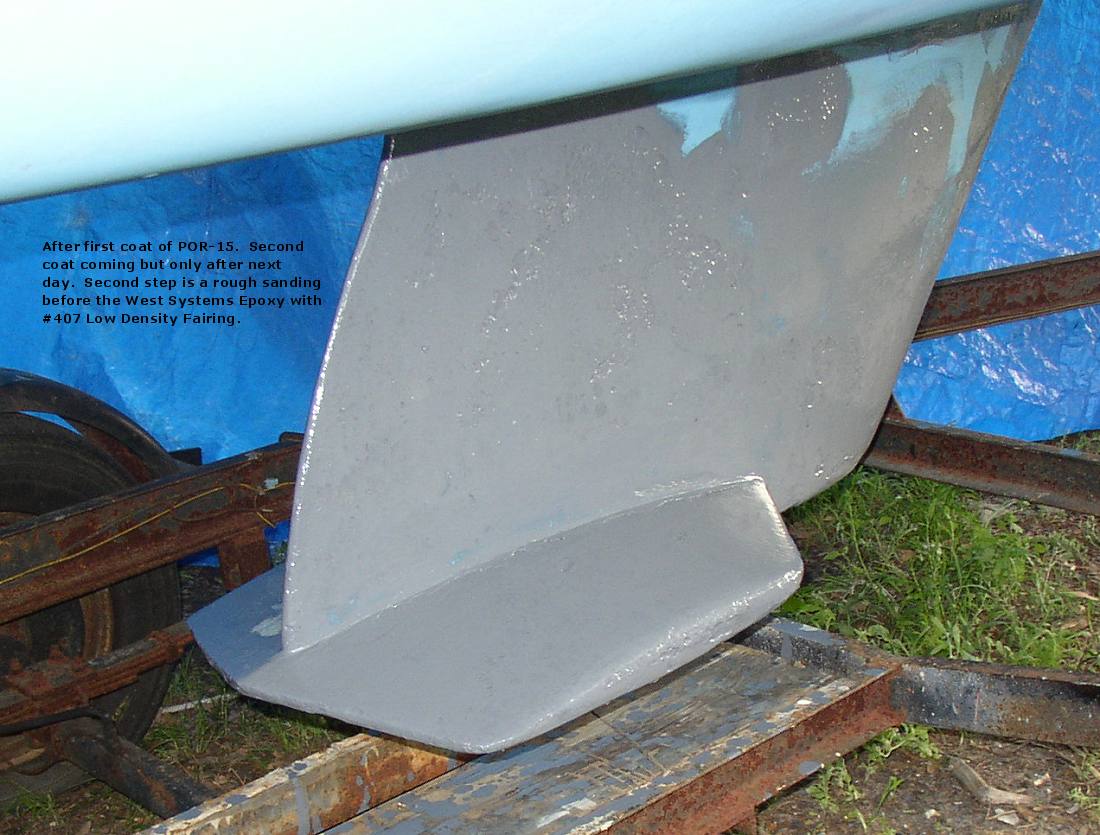
What am I doing? I am going to go with the POR-15
approach (gray) after wire brushing and grinding
the keel (My first option of sandblasting fell to complications
in renting the gear). Various newsgroups online (Tanzer etc) have
reported excellent results with virtually no rust return. See more
POR-15 info via their FAQ.
After this, I will be applying a full barrier coating, fairing,
and bottom paint. I hope to add a page on this in place of below.
Stay tuned.
For the fairing compound, I chose to use the oft acclaimed but expensive
West
Systems 105/206 Epoxy Resin/Hardener solution thickened
with
#407 Low Density Filler
for the ease of sanding and excellent consistency (Filler
chart). While West Systems is a more costly, it is certainly
great to work with while being simply the strongest solution. See
details below.
| F235
Iron Keel Escapade: The
Ordeal has begun.... |
UPDATE
6/13/03
NOTE:
Click on shots at right for full view
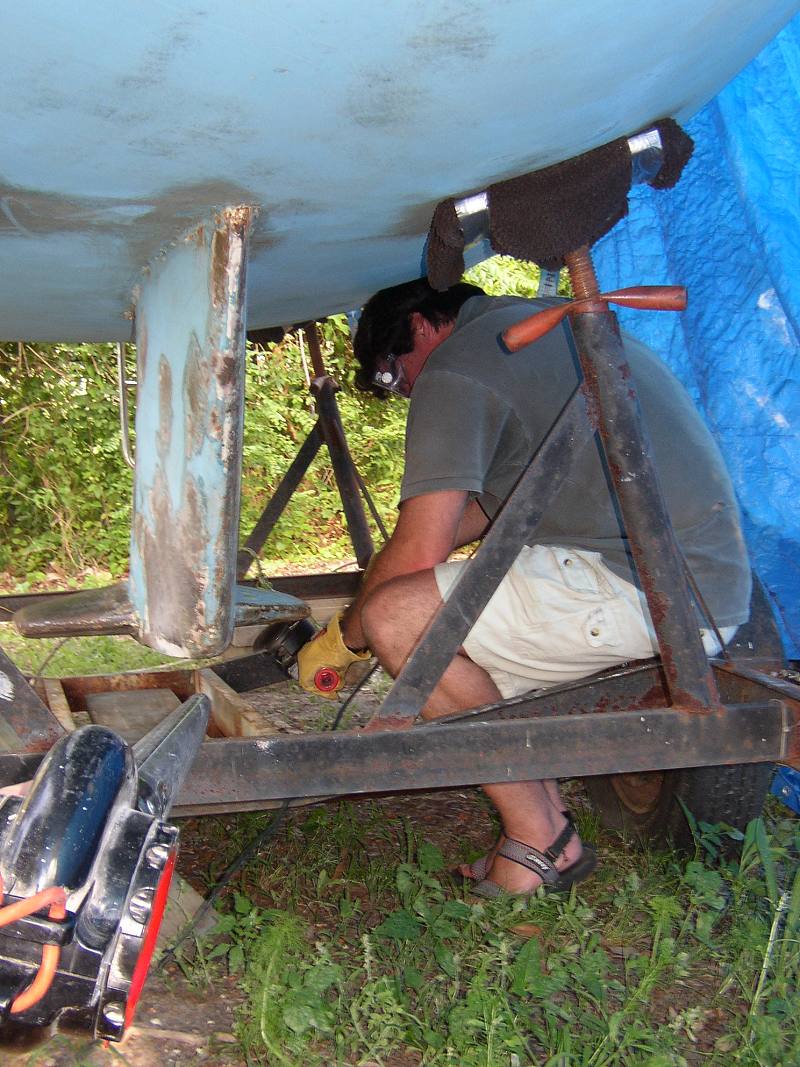
Now for the dreaded sanding of iron keel, surely
the bane of any iron keel owner's existence. Sandblasting
to bare iron with a commercial blaster is the best
option here. Heavy duty sandblasters usually rent
for $100 for a half day, with serious compressor,
blaster, and sand bucket. This is easily enough
time to do the job although I would recommend preparing
the area before you pick it up. Make sure you coat
the underside of hull around keel with some rubber
backing to keep sand from damaging hull. I actually
opted to use a industrial wire wheel brush on a
grinder. This actually did ok but one should ultimately
go the sand blasting for more perfection. Surprisingly
enough, the industrial wire brush did VERY well.
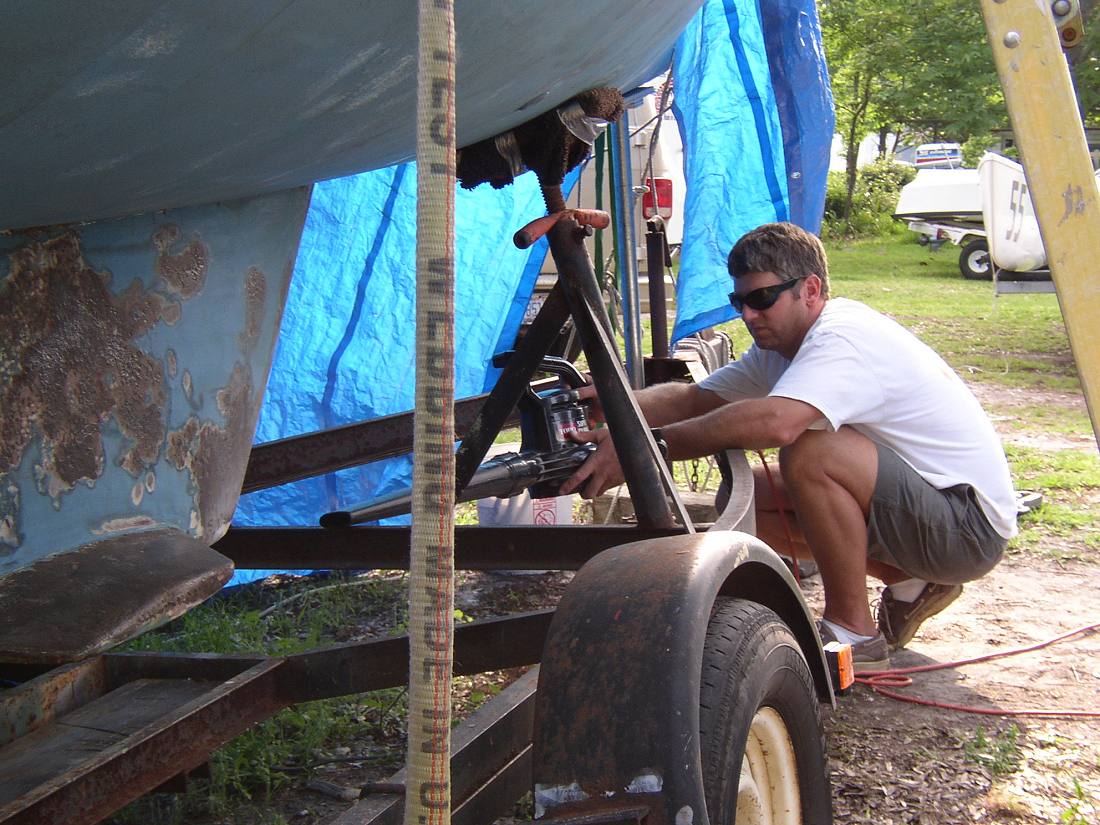
IT lasted JUST long enough! One good trick here
is to get a leaf blower and focus it on the keel
like the pic at right. This blows all the refuse
and dust away from the work area. IT helps if you
have the boat in a friend's backyard!
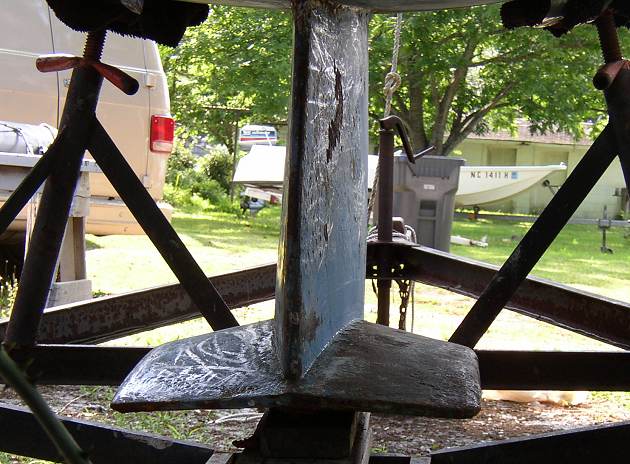
Step 2 I have now done the first two coats
of POR-15 with good results. One should follow
the instructions closely, however. But application
of the product is a breeze; it goes on with excellent
coverage! I have over 3/4 of my quart left with
two coats on the keel above. Pictures will be posted
soon. I believe I might bypass the Interlux Interprotect
2000/2001E Epoxy coating as I am not sure it's even
now necessary. The covering looks impressive, indeed!
I do need to do some fairing and will probably use
West Systems Epoxy with #407 as a filler.
Step 3 Well, I have finally faired the keel
with West Systems 105 Epoxy with 206 slow hardener
mixed with #407 Low Density filler. West Systems
products work great and I recommend them just like
everyone else. I had to make sure the POR-15 covering,
which is shiny and hard as the proverbial rock,
was sanded enough for the epoxy to make a good bond.
I used 80-100 grit for this.
Ultimately, this is the step where time does help
as you really need several steps of fairing to get
the keel perfect. You can get as particular as you
want but if not racing, common sense rules. However,
the more careful you are in this step, the better
the results will be. One careful fairing run will
do better than two sloppy ones. OF course, a lot
of the final result is the sanding, which is surely
MUCH easier if you are smooth with the fairing step.
I had purchased Interlux 2000/2001E as my
barrier coating paint after the fairing. I think
this will be taken back since two more coats of
POR-15 would seem just as fine a choice based on
results so far. This stuff really does well and
had gotten nothing but high marks from others who
have used it.
Stay tuned for more pics and report.
I have not yet taken
pictures of the keel after the fairing with WEST
SYSTEMS. But I can say this POR-15 is really good
stuff. PICS COMING.
|
|
|
Here are a few other articles and posts relating to the Iron Keel
Dilemma. Soak it all in and decide what you think makes the most
sense...
Preventative Maintenance
and Repairs
From Practical
Sailor.com .pdf file
by John Pazereskis
Remedies for Rusty Iron Keels
 The
best way to treat an iron keel that is rusting is to sandblast the
entire surface and apply an epoxy based coating system. But that's
not always feasible or desirable. Because of the mess involved,
many boat yards do not allow sandblasting. Even when this is permissible,
a complete recoating job also means a complete refairing job, and
that in turn means lots of slow, dirty work if anything approaching
a proper, smooth foil is to be achieved. The
best way to treat an iron keel that is rusting is to sandblast the
entire surface and apply an epoxy based coating system. But that's
not always feasible or desirable. Because of the mess involved,
many boat yards do not allow sandblasting. Even when this is permissible,
a complete recoating job also means a complete refairing job, and
that in turn means lots of slow, dirty work if anything approaching
a proper, smooth foil is to be achieved.
Because of the problems involved in
completely refinishing an iron keel, patch painting of rusted spots
is often the only practical way to go. Begin by cleaning the rusted
spots as thoroughly as possible. Take your time here as this
is the most important step. Chip off any scale with a cold chisel
or welder's chipping hammer, then wire brush (use a drill-powered
brush where possible) and sand with coarse paper until you're down
to clean, bright iron. Use fine sandpaper (150 grit) to feather
in surrounding, sound paint, and you're ready for your new coating.
Get paint on the bare prepared iron as soon as possible. Iron will
begin to oxidize almost immediately, and leaving it bare overnight
will make much of your preparation go for naught. Unfortunately,
the best possible anti-rust coatings (those with epoxy bases which
are true vapor barriers) are not compatible with other paints. Epoxies
just won't stick to other coatings; and, thus, because patch painting
must lap over onto other paint, epoxies can't be used in this application.
 My
own experience backs up the recommendations of the paint manufacturers.
The best coating to use in patch painting iron is zinc chromate
paint. All the major manufacturers of marine coatings make a
good zinc chromate. Take your choice and follow the directions.
The most important rule to follow is three coats must be used. The
object is to form as nearly an impenetrable barrier to water as
possible, and three coats give a far better chance than one or two.
Patch painting isn't the ultimate answer. Careful preparation and
three coats of zinc chromate paint, however, make for an economical
and effective solution. My
own experience backs up the recommendations of the paint manufacturers.
The best coating to use in patch painting iron is zinc chromate
paint. All the major manufacturers of marine coatings make a
good zinc chromate. Take your choice and follow the directions.
The most important rule to follow is three coats must be used. The
object is to form as nearly an impenetrable barrier to water as
possible, and three coats give a far better chance than one or two.
Patch painting isn't the ultimate answer. Careful preparation and
three coats of zinc chromate paint, however, make for an economical
and effective solution.
To make sure your keel doesn't begin
to corrode again, you must completely isolate the surface of the
keel from the bottom paint with an epoxy barrier. This is a two-stage
process. First the keel must be primed with a vinyl primer, such
as Regatta Vinyltex 50/51 or Interlux Vinyl-Lux Primewash 353. The
primed keel can then be overcoated with an epoxy mastic such as
Regatta Epoxydur Mastic 3630-3631. Several coats of the epoxy mastic
can be used. The thicker the
coating, the more effective the barrier. The epoxy mastic does not
sand well, so special care must be taken before application to get
a smooth keel surface. This same epoxy system can be used on iron
keels that have been blasted or ground to bright metal, but is only
effective on a completely clean surface free of any rust or scale.
Surface preparation and the timing of application of the coats of
vinylepoxy systems are critical, so the manufacturer's instructions
must be followed to the letter. The only drawback to epoxy sealing
of an external keel is that it no longer functions as a good ground
plate for Loran and single sideband, or as access to ground in a
lightning protection system. To compensate, you should install an
external grounding plate.
Some newsgroup interchange on the
subject below
Subject: Re: Fairing/painting
cast iron keel
From: Tom Dacon (Tom@dacons.com)
Newsgroups: rec.boats.building
 The
technique I've used on two different iron-keeled boats, over a
total of twenty-eight years of ownership, with excellent results
is: The
technique I've used on two different iron-keeled boats, over a
total of twenty-eight years of ownership, with excellent results
is:
1. Sandblast the keel, going
after all traces of rust, until the metal is what they call "white"
(an uniform light gray).
2. Immediately afterwards (within
minutes), paint it with Ospho (phosphoric acid), going around
and around it until the Ospho stays shiny. Let this dry. Try not
to let the Ospho-treated surface stand overnight in humid conditions
- it's hygroscopic, and the next morning you'll find some rust
spots down in the pits. If you do, wirebrush them and Ospho them
again.
3. If there is pitting that
you want to fill up, fill it with an epoxy-based filler. In southern
California, we use something called Red Hand, which is a two-part
filler that mixes up dark red. They named it Red Hand for a good
reason
4. After the fairing compound
has cured, fair it with a sander, body file, or whatever you need
to use to get it smooth.
5. If the fairing process exposed
some bare metal, as it almost certainly will, re-treat the exposed
metal with Ospho.
6. Give the keel several full-strength
coats of a barrier coat. This might be vinyl red lead, which is
what I use, or some other barrier coat recommended by the paint
manufacturers. If you use vinyl red lead, which comes in various
colors, use two different colors for the coats, so that you can
tell that you're getting full coverage.
7. Finish off with several
coats of bottom paint.
This treatment has served me
really well. When I sold the first of my iron-keeled boats, a
couple of years after a treatment like this, the buyer was surprised
to hear that the keel was iron - there wasn't a rust spot on it.
On the boat I have now, there's usually a little bit of repair
that needs to be done at each haulout, where the ballast keel
joins the wooden keel timber. I just scrape it clean, wirebrush
it, Ospho it, fill it with thickened West epoxy, and paint it.
Tom Dacon
More comments...
I have put two coats of epoxy paint
over cast iron keel and it stopped rust completely. After that
you can do something for a smooth finish but dont sand through
the epoxy. by the way i have been told 6 coats of epoxy is necessary
to stop osmosis but this experience tells me two is good enough
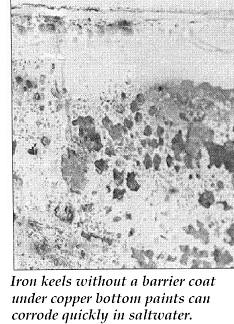
In any case, the iron keel should
have a coat of paint before the anti-fouling is applied.Without
a non-metallic paint as a barrier between the iron and anti-fouling
paint, you have put 2 dissimilar metals together. Probably common
knowledge, but bears repeating.
As the owner of a boat that has probably
spent close to 30 years in salt water (with an iron keel) I would
say don't worry if it has been maintained.
My Grampian 23 has a cast iron keel
that was originally coated (epoxy or fibreglass?) but it now has
several areas where the original coating has been damaged.
When I haul it out (every 2 years)
I scrape off any loose paint, and rough up the good paint. Then
I prime the iron casting followed by good bottom paint.
I am generally just seeing a bit
of surface rust and even this has been reduced greatly now that
I moved the zincs from their previous owner installed location
on the fibreglass rudder (!!!) to a cleaned off area on the iron
keel.
The boat is in the water about 103
weeks out of every 104 (2 years) due to our mild climate and this
maintenance routine seems to keep corrosion in check.
Subject: Painting a Cast Iron Keel
From: Chris Webb (chris@2020engineering.com)
Can anyone give me some reccommendations
about painting the cast iron keel on my 1967 Cal 20?
Last year I decided to do it right
and grind it down to bare metal, osfo it, then do a coat of epoxy
paint and then bottom paint.
Two weeks after she came out of the
water in october it all peeled off to the osfo.
Frustrated in Bellingham, WA
Subject: Re: Painting a Cast Iron
Keel
From: Capt. Neal® (Capt.Neal@Bigfoot.com)
I have a cast iron keel on my Coronado
27. Your mistake is using the Ospho.
This what your should do. Have the
thing sandblasted to bare metal. Coat it with a layer of Zinc
Chromate paint right away before any rust develops. Let the paint
dry 24 hours. Get a couple gallons of the thick two-part epoxy--not
the paint, the glue type epoxy. Mix it up in managable batches
and trowel it on as smoothly as you can. Lay it on thickly. Try
to make it as smooth as possible with minimal ridges. Let it dry
24 to 48 hours and get after it with a DA or rotary grinder with
a light touch. Remove all the ridges and trowel marks and then
put bottom paint directly on the roughened surface.
Nothing should fall off after this
application.
Respectfully, Capt. Neal
For what it's worth, here are my
suggestions. First, you can get rid of rust, but you can't stop
it (from coming back, that is). You can only slow it down from
coming back soon. So, here goes: go down to bare substrate, use
a chemical conversion mixture of phosphoric acid or auto paint
supply stores do have a rust conversion product that is quite
effective. There are various companies that make this type of
product, you should have no trouble finding one or the other.
Take you time with this step, get rid of all the rust or you will
waste your time and money. Next, and on the same day prime with
a 2-part epoxy primer. (reason: clean bare metal begins to oxidize
immediately) Over this you can apply a primer-surfacer which has
filling ability because it's thicker, this will give you some
"meat" to rough sand without breaking through to the
bare metal again. Next, you can apply your fairing compound. (incidentally,
both fairing compound and bondo are porous, it's just that fairing
compound is stronger and flexible for boat bottoms.) Because of
this porocity you must then (after fairing to shape) apply several
coats of epoxy primer again. Now you are ready for your antifoulant
paint. International makes a variety of bottom coats to suit your
needs and budget. US Paint makes an antifoulant paint but its
expensive. Whatever, your choice. The key is take your time with
the preparation, and you will have a job that lasts (not forever,
but long enough). Of course, every time you haul out check the
bottom carefully. Have fun!
|