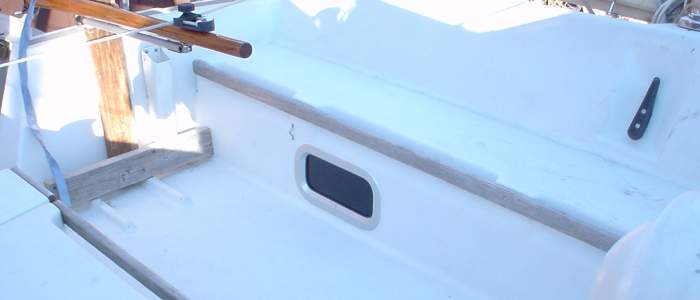
The aft quarter berth on the First 235
offers reasonable accommodations for one or two people depending
on size. But those sleeping quarters get stuffy and crowded fast
because of the lack of ventilation in the stock boat. You could
replace the 8" round fixed port with one that opens - but
there is an awful lot of water right there. I decided to add
an opening portlight into the cockpit. It adds ventilation and
as a bonus lets in even more light.
Materials:
• 1 Lewmar Size 0 Standard
Port Light, # 393020500 Opening Smoke Grey
This portlight is rated for
use on the exterior hull above the waterline, and stays water
tight even at 5 PSI. This kit includes a bug screen, too.
• Sealant/Caulking
3M 4200 (white)
• 1 piece 14" x 8" x 1/8 masonite
• Masking tape
• Kraft paper
• Paper towels
Tools Needed:
• Electric Jigsaw (with
a smallish body - see text)
• Electric Drill
• Coarse File
• Phillips screwdriver
• Mineral spirits
Installation:
The tough part of this whole thing is not
the portlight work but rather the mental decision associated with
making a GIANT "forever" hole in your pretty boat.
I do not even like drilling a 1/8 through my deck, so this took
some guts. No, make that LOTS of guts.
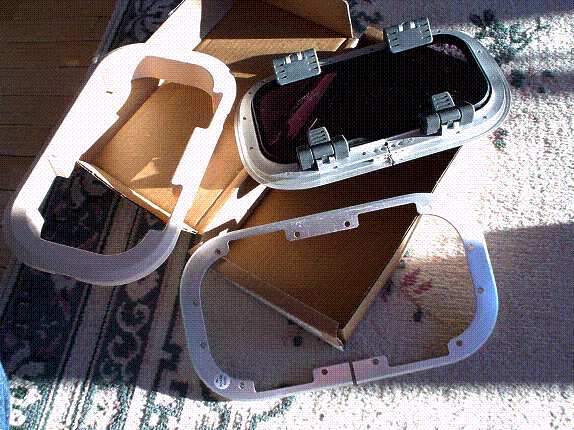
Installation of the portlight itself is
easy and only takes a couple hours. In the following picture
clockwise from the upper right: The portlight (fits in from the
outside of the boat), the backing plate (its on from inside),
and the trim panel (snaps in place when you are totally finished).
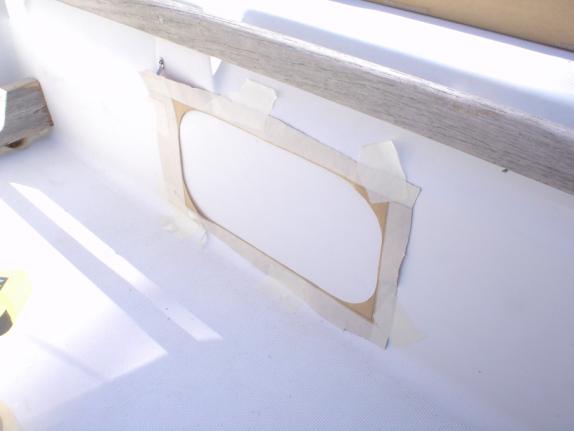
Start by making a template out of Kraft
paper. The Lewmar kit does not come with one. The template opening
should be 156mm x 303mm. The corners have 52mm radius.
Consider the location of your portlight
carefully. There is not a lot of flat real estate in the cockpit
wall. Near the floor of the cockpit, it is rounded. Near the
seat the vertical surface slopes under the handrails. The Lewmar
Size 0 is about the biggest you can fit height-wise. If you want
to install something larger, measure very carefully before you
order. The portlight MUST mount perfectly flat or you won't be
able to make it watertight. I decided to place mine enough foreword
so it wasn't behind the gas tank I normally keep in the stern.
The portlight can go farther aft if you like. Tape the template
to the cockpit wall, making sure it is parallel to the hand rails.
Then trace the opening with a soft pencil and remove the template
(save it for a later step).
Inside the quarter berth, pull the carpet
headliner away from the area where you will be cutting the hole.
Go back outside.
If you are sure you want to do this, drill
a starting hole big enough to allow your jig saw blade.
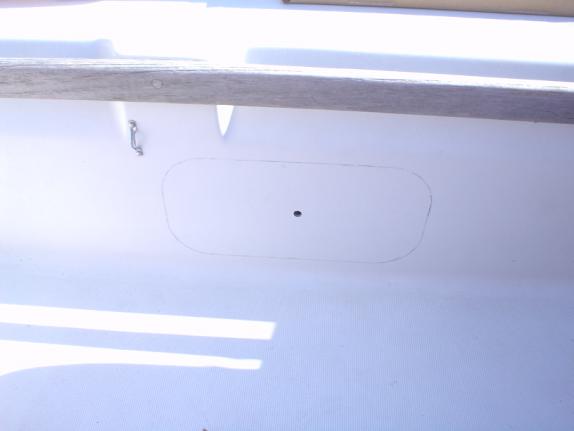
Sailor, you are now definitely committed,
like it or not.
Put a few layers of masking tape around
the opening for the jig saw to ride on so the surface doesn't
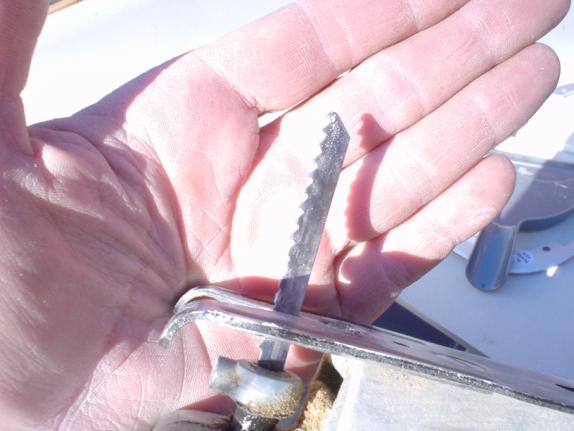
get messed up. Saw out the opening with a jigsaw. I found the
gel coat did not crack or shatter, but rather cuts with a nice
clean line, leaving a lots better edge that I thought it would.
But cutting fiberglass is brutal to the saw blade. By the time
I was done the opening the blade was toast (see just above the
baseplate where all the cutting took place - Look, Ma. No teeth!):
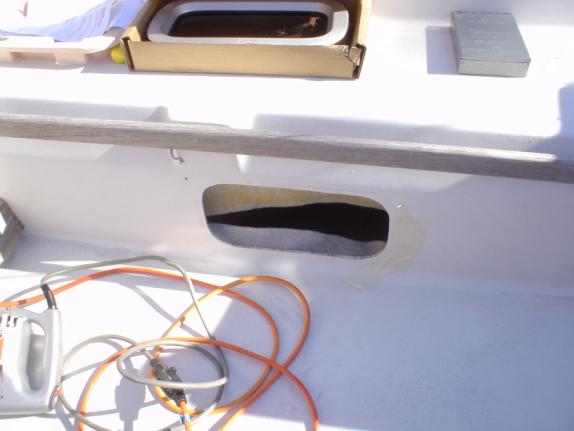
The hole turned out well. There was just
enough clearance to negotiate the jig saw all the way around.
If your jigsaw is too big you will have to go to Plan B (and that's
up to you!). Make sure the portlight fits in and lays perfectly
flush against the cockpit wall. File the hole a little if needed.
Inside the boat, cut the headliner out to
the size of the fiberglass opening. Then fold or pin it well
out of the way.
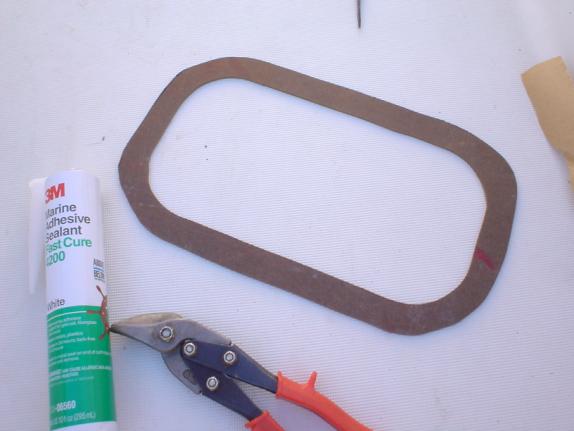
The portlight REQUIRES a minimum wall thickness
of 6mm in order to clamp tight, and you cannot cheat here. The
First 235 wall thickness in this area is not enough being only
5 1/2 mm on my boat. Use the template and trace the opening onto
the masonite. Draw a second line all around the first line about
1" farther out. Cut it out, which will result in a big,
oval shaped 1/8" thick masonite washer.
Dry fit the portlight and hold it in the
hole with some masking tape. From the inside slide the wooden
washer over it. Make sure that the portlight goes through the
masonite and that the masonite is pressed 100% flush against the
inside of the cockpit wall. This makes the wall of the cockpit
1/8" thicker, and is just what you need. Place the metal
Backing Plate over the inside of the portlight making certain
the proper side of it faces inboard (it's marked with a sticker).
The portlight comes with a dozen M5 x 20
screws. They are way too long for our thin walls. Cut them to
a length of 12 mm from the underside of the head to the end of
the screw. Use a hacksaw. Cut just one initially and test fit
it. They are screwed in from the inside of the boat. If they
are too short they won't catch the threads of the portlight.
If they are too long they will physically damage the aluminum
trim ring around the outside of the portlight in the cockpit.
Cinch down the test screw and try to wobble the portlight athwartship.
It should have zero play and feel rock solid. If the screw length
is OK, cut the rest of the screws to the same length.
Remove the portlight from the hull. Run
a 1/4" bead of 3M 4200 (or a good marine grade silicon) all
around outer inside edge of the portlight. More is better than
too little. Push the portlight into the opening, press it firmly
and make it flush. Sealant should ooze out around the edges.
If not, pull it out and add more sealant. Let the oozage just
sit there. It will take a couple of hours to cure, you have plenty
of time to clean it up after the next steps.
From inside the boat, run a 1/4" bead
of sealant all around the portlight making a gap-filling filet
between the hull and the portlight body. Don't skimp. Then press
the masonite washer over the portlight, thus squashing the sealant
in place. Place the correctly oriented Backing Plate into position
and attach it loosely with the 12 screws. Once all screws are
started, tighten opposite screws (like you're putting on a spare
tire) until all are good and tight. Your goal is a backing plate-masonite-hull
sealant sandwich that is flush, solid, waterproof and immovable.
The slightest movement means trouble. You have to take the time
to correct it. It should feel absolutely solid. Stop tightening
the screws when you think they have 1/8 turn left. You'll come
back TOMORROW and take that last 1/8 turn after the sealant has
cured.
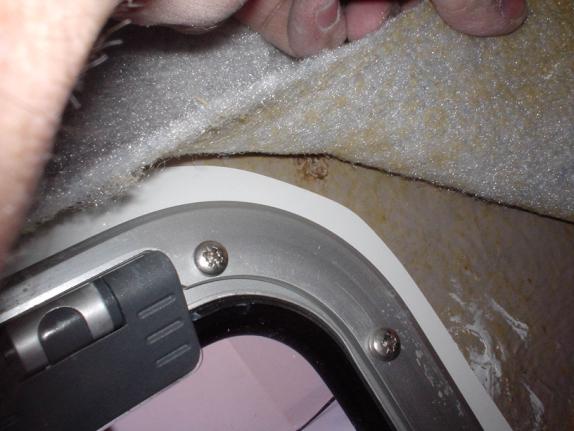
Here's how the inside should look (my masonite
is white on one side and brown on the other - here you see the
white side)
Out in the cockpit, check to make sure the
portlight is absolutely flush to the cockpit wall. Using your
finger tip, filet the oozed sealant all the way around. Take
care not to get sealant on the acrylic window. Clean up the aluminum
trim and fiberglass with a paper towel moistened with mineral
spirits.
Allow 24 hours for the sealant to set up.
Then take the last 1/8 turn on the screws. Take the plastic trim
panel and cut it's spigot length down to the proper size so it
can snap into position over the inside of the portlight. This
is easy and you can use scissors or a snipper. Final trim the
headliner so it butts up against the edge of the aluminum backing
plate. Re-glue the headliner. Snap the trim panel in place (it
will also hold the edges of the headliner captive).
Here's the nice result:
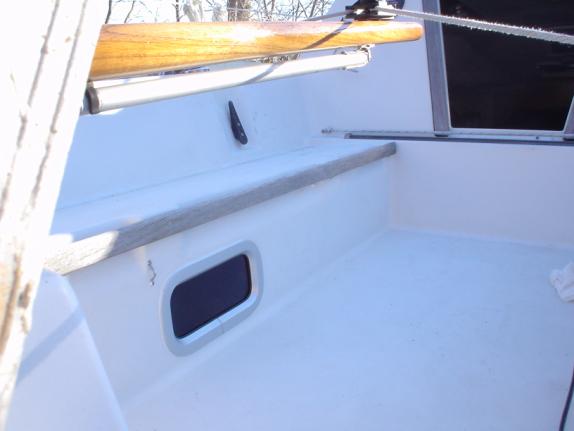
Next, I need to do something about that
pathetic weathered teak!
- return to Beneteau
First 235 Mods Online